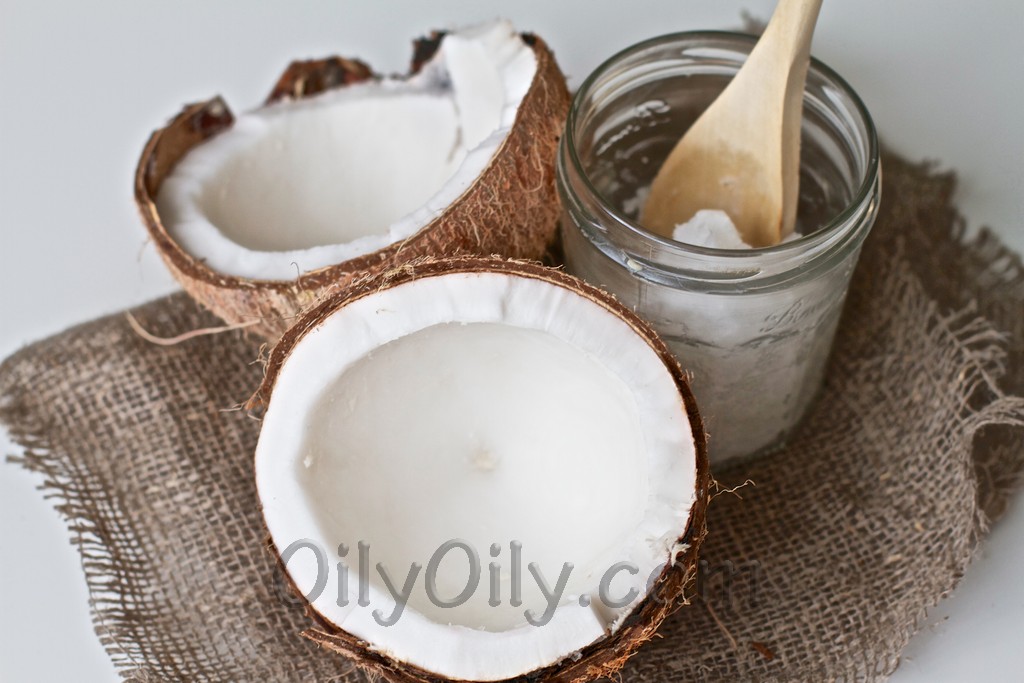
Coconut oil is famous for its nourishing and healing effect for the skin. Coconut oil soap has been known and taken advantage from for hundreds of years. If you use a soap that contains coconut oil, it can help you to fight a number of rather serious skin problems.
According to Wikipedia, coconut oil is a valuable ingredient in most of soaps because it makes the soap be harder so your bars have a longer life. Pure coconut oil soap has a mild aroma and creamy white color. It can be easily found in every beauty shop or drug store. However hand-crafted coconut oil soap has some distinctive advantages. It is made from completely natural ingredients and essential oils, so there are no chemical additives in them. It should be also taken into account that when you buy coconut oil soap from large manufacturers they contain less natural glycerin and therefore lose some of their moisturizing properties. Read also about coconut oil shampoo.
If you what to make coconut oil soap at home, be sure you are aware of all the dangers of the process of soap making. You’d better read some books on this topic or even take some classes. Nevertheless you won’t regret it as coconut oil soap is relatively easy to make and it is very fragrant, hard, and bubbly and has great moisturizing abilities.
SEE ALSO: Is Coconut Oil Alzheimer’s Hoax
Pure coconut oil soap
Ingredients
- 5 ounces of water
- 2.5 ounces of lye
- 16 ounces of coconut oil (you may buy bulk coconut oil)
RELATED: When Can We USe Fractionated Coconut Oil
Directions:
- Dress up for making soap – safety glasses, rubber gloves and a shirt with long sleeves would be fine. Prepare all required ingredients and equipment.
- Pour the lye to the water. Be careful as because of the chemical reaction the mixture will get very hot and the fumes that will occur are poisonous. Keep stirring until the lye is dissolved and then put the mixture aside to cool to approximately 105 degrees (you can measure the temperature with a candy thermometer).
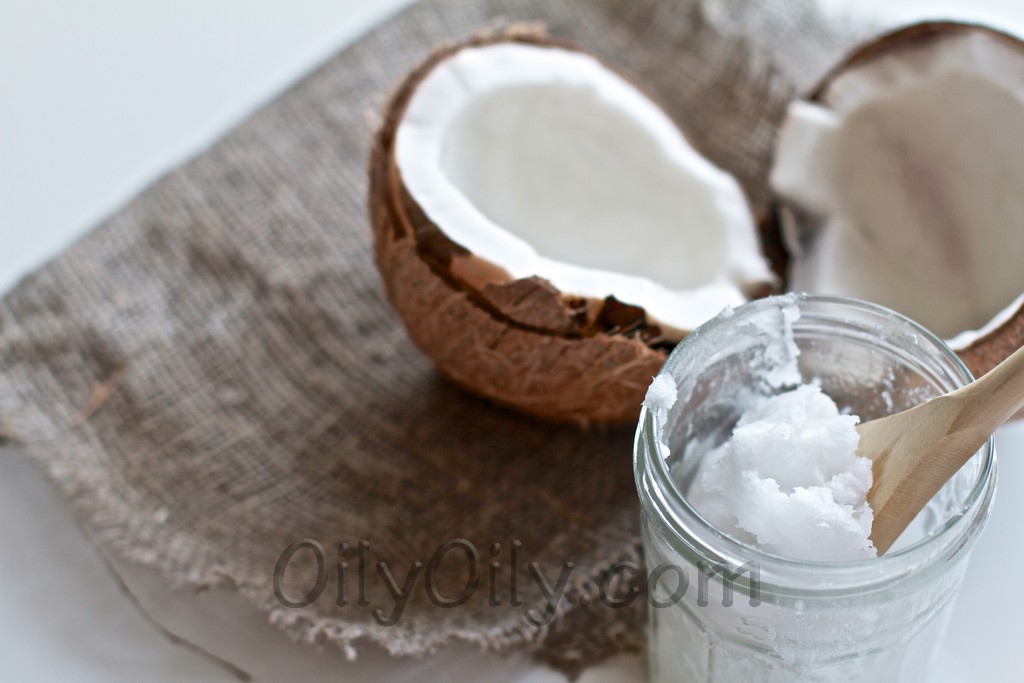
- Heat the coconut oil in a stainless steel pot and softly stir with a wooden spoon until melted. Set it aside to cool to 110 degrees nearly (the coconut oil should be slightly colder than the lye mixture).
- Very slowly and carefully pour the lye mixture to the oil mixture until combined. Stir constantly either by hand or with a hand held blender until the mixture begins to saponify and gets thick. The spoon should begin to leave an apparent stirring trail in the soap mixture. If so, the mixture ‘traces’ and the key moment of the soap making process is passed.
- Pour the soap mixture into the molds which you prepared and leave in some cool and dry place for 3-5 days. Then remove the soap from the molds. Allow it to rest undisturbed for about 6 weeks for the saponification process to be completed.
- Enjoy your soap with its fragrant lather and mild moisturizing properties.
This was the recipe of pure coconut oil soap, however you can add to this formula any other oil you like. We would recommend you to try adding olive and palm oils to this recipe. The combination of these three oils which complement each other greatly will make your soap gentle and it will lather and clean fairly well as olive oil and palm oil benefit for skin too. The proportion should be as follows:
- Coconut oil –25%
- Olive oil –45%
- Palm oil – 30%
Coconut oil shampoo is well-known for its moistening and antimicrobial properties. The oil has been used in Asia for treating all kinds of hair problems for many years. Medium-chain fatty acids contained in coconut oil nourish and moisturize hair from the inside out. Coconut oil is a popular ingredient in most of commercial shampoos, however you can easily make your own coconut oil shampoo at home.
Coconut oil and hair treatment
- Coconut oil shampoo nourishes the hair roots and follicles which make your hair healthier. Read more about coconut oil for hair.
- It prevents hair breakage due to its moistening properties
- The medium-chain fatty acids contained in coconut oil help to prevent and treat dandruff. Due to its antibacterial properties, coconut oil kills dandruff fungus
- Coconut oil is rich in Vitamin E, which makes hair healthy and vitalizes it
- Natural antioxidants that can be found in coconut oil fight the free radicals that destroy the elasticity of your hair. Using coconut oil regularly will protect you from premature hair loss and greyness.
- Coconut oil stimulates hair growth and helps it to keep protein
- It penetrates your hair and makes it shiny and soft.
According to CoconutOilfacts, coconut oil shampoo can do a lot of good for dry and brittle hair. If you can’t find a commercial shampoo containing coconut oil, which you can rely on, just add a little amount of coconut oil to any organic or herbal shampoo that you prefer. Otherwise simply make coconut oil shampoo by yourself at home, which is by the way very easy and interesting.
SEE ALSO: Where to Buy Coconut Oil?
Coconut oil shampoo for dry hair
Ingredients
- ½ cup water
- ¼ cup coconut milk
- ¼ cup rose petals (organic)
- 3 tbsp. of Castile soap (the soap which is made from purely vegetable fat)
- 1-2 tbsp. of virgin coconut oil (find out how to choose the best coconut oil)
- a couple of drops of rosewood oil
Step 1
Soak the rose petals in hot water and leave for about half an hour
Step 2
Melt the coconut oil and grate the Castile soap
Step 3
Strain the rose petals and combine them with other ingredients. Thoroughly whisk the mixture.
Step 4
Allow your shampoo to solidify in a cool and dark place.
YOU MIGHT ALSO LIKE: How to Make Castor Oil Shanpoo at Home
How to store and apply
Coconut oil shampoo can be stored in your bathroom in a cool and dark place necessarily tightly sealed. To apply smear off about 1 tablespoon of the solid coconut oil shampoo and massage it into your scalp and hair. Leave it for 3-5 minutes so that all the ingredients could thoroughly permeate you hair. Rinse off with warm water.
Rosewood and coconut oil make a perfect combination for dry hair treatment and smell greatly together. However try to experiment with other essential oils as well. Peppermint, orange and tea tree oils will add a touch of freshness and exotics to your homemade shampoo.
]]>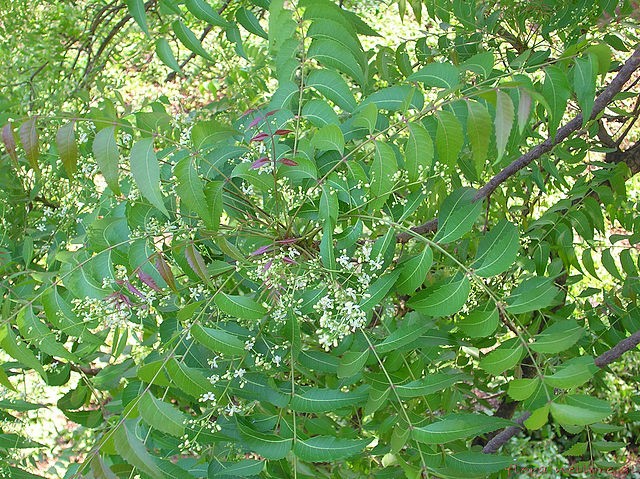
Photo credit: wikimedia
The use of neem oil for scabies lets eliminate scabies naturally. As Wikipedia states scabies is a serious skin disease which occurs as a result of itch mites invasion. These tiny insects cause such symptoms as mite tunnels, itching, redness and rash. Scabies is very contagious, and the easiest way to get them is close skin-to-skin contact, especially through hand holding or sex. The scabies treatment will demand certain amount of time, effort and patience, and it also requires insecticide and not the usual medicine. This leads us to the argument, why neem oil is a great product in scabies treatment and how to use neem oil for scabies to achieve results.
Neem VS mites
Royal Society for Tropical Medicine and Hygiene published a report that talked about patients with scabies, who went under neem oil treatment. 97% of the patients who used the mixture of neem and turmeric were cured in a period from 3 to 15 days, while patients who received treatment with a mixture of neem and carrier lotion recovered in 3 days. Since neem oil has anti-bacterial properties, it effectively eliminates skin parasites (neem oil can also be used for dogs). Neem oil also works as a repellent keeping the biting insects away. Azadirachtin that is found in neem, works as a hormone blocker for the insects, confusing them and making them “forget” to mate thus breaking their life cycles.
SEE ALSO: Neem oil Insecticide – Experience All Benefits
How to use neem oil for scabies?
Minor case
In case the infestation is not too severe, simply apply pure neem oil on infected areas and leave it for 10-15 minutes (. Repeat the procedure twice a day until the symptoms are eliminated. However, do not forget to visit the doctor as independent treatment is not recommended.
YOU MAY ALSO TRY: Neem Oil for Bed Bugs Elimination
Severe infestation
If you are suffering from severe scabies case, take neem oil bath. Mix few tablespoons of pure oil with a bit of liquid soap and pour the mixture in a hot bath. Add also tea tree oil for scabies treatment. Stay in the water for at least 10 minutes, and afterwards (not necessary, though) apply neem-based lotion or cream. Continue the treatment until the infestation is gone and again, consult the doctor during and after the treatment.
]]>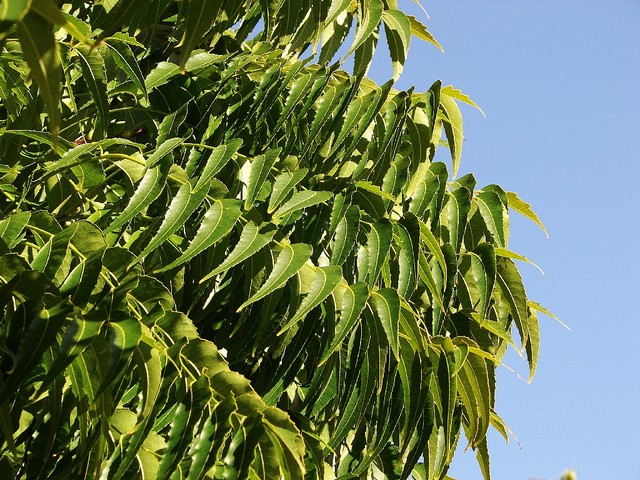
Photo credit: flickr
Try a neem oil insecticide. Among many benefits of neem oil is its feature of being a perfect insecticide. Neem oil can help you eliminate unwanted insects and keep the plants healthy.
How does neem do it?
Some gardeners may have doubts concerning neem since they do not see the immediate effect. Unlike many other insecticides, neem oil does not straightaway kill the insects, but has a long-term effect in their elimination. Because of the substances that are contained in neem, insects are basically getting confused, “forgetting” to mate and feed. This leads to the whole generation break, destroying the lifecycle of the creatures and therefore ensuring the protection for the plants. Another thing is that neem does not hurt beneficial insects.
SEE ALSO: Neem Oil for Bed Bugs Elimination
How to use neem oil on plants?
The easiest and most convenient way to apply neem oil on plants is to spray it. You can make a neem oil spray by yourself and it is advised to use it as soon as possible after preparation. For making the spray with the 0.5% solution (general purpose one) you will need 5 ml of neem oil, 1-2ml of detergent (or insecticide liquid soap) and 1 liter of warm water.
- First mix the water with detergent
- Afterwards slowly add neem oil, stirring constantly
- Put the mixture in a sprayer
- Use right after preparation or as soon as possible and do not forget to regularly shake the sprayer
Neem oil against spider mites
Spider mites are small insects that tend to pierce the plants. They usually cover the whole plant in formations resembling spider webs, where their colonies and eggs are. In order to get rid of them, it is recommended to use a neem spray with concentration from 1 to 4 percent. As well you will need to use it generously as it has to get in physical contact with both insects and colonies. As a result, neem will not only eliminate the existing insects but also break their lifecycle and therefore prevent them from appearing on plants anymore.
YOU MIGHT ALSO LIKE: All Uses of Neem Oil
Dealing with powdery mildew
Another unpleasant thing any gardener would not like to see is powdery mildew. This disease has a fungal origin and can be easily recognized by white or grey spots and coating on the leaves of the plant. Powdery mildew causes serious damage to the plant like leaf yellowing and premature drop. To deal with it, do the following:
Watch for conditions
Powdery mildew feels perfect in dry, warm places with bad air circulation. Make sure to double-check your plants during warm time and allow good air flow to the place where plants grow.
Destroy the infected leaves and plant parts
If you notice an infected leaf, remove it and destroy, but do not just bury.
Use neem oil spray
Being antifungal, neem oil is a perfect solution for powdery mildew elimination. Spray the plant regularly with neem oil spray in order to eliminate and prevent further powdery mildew occurance. You may add a few drops of tea tree oil (Read more about tea tree oil uses).
]]>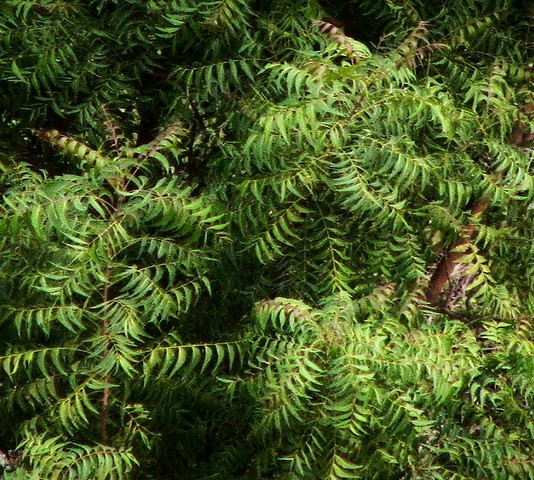
Photo credit: flickr
The use of neem oil for acne treatment is an easy and natural way to combat acne. One of the most recognized and unpleasant skin diseases is acne, which may strike at any age. There are many reasons why acne happens, the main one being hormonal imbalance. Among other reasons may be stress, improper diet and lifestyle. So what is acne and acne scars and how can it be treated with neem oil?
Acne and acne scars
Acne is a result of blocked skin pores. When too much skin oil is produced (because of overactive hormonal activity), the pores are getting clogged and inflammation occurs. This leads to the appearance of whiteheads and blackheads, pimples and redness. Acne scars also take place, being visible and unpleasant marks on the skin.
Now all this sounds like a really serious condition that needs proper treatment. According to Wikipedia neem oil for acne and acne scars treatment can be used, but it doesn’t eliminate acne alone and it doesn’t do miracles. Neem rather contributes to the decrease and elimination of symptoms due to its anti-inflammatory and anti-bacterial properties. Neem oil used for acne scars improves cells regeneration. Therefore let’s have a look at the action plan you need when combating acne.
SEE ALSO: Sea Buckthorn Oil and Acne – Is There Any Effect?
Do’s and Don’ts
Here are few important things to remember when treating acne with neem products:
Do use neem oil soap
You can either buy it or make it. To make a neem oil soap, simply mix 1 tbsp of neem oil with 1 cup of liquid face soap and use it twice a day. If you consider buying neem soap, remember to go for the mildest. It is important to choose soap that has neem oil as a base (and not just an addition of the extract) and ideally it also can be moisturizing.
Do not switch to neem from the medicine you are already using
Neem oil is undoubtedly good for your skin but not when you suddenly switch to it from the products you generally use. Even if the effect is not seen immediately does not mean neem oil will do better job. So give your medicine some time and in case it does not work at all, consult the doctor first and only then decide whether you can give neem a try. Also read about neem oil side effects.
Do apply neem oil on infected areas
For this, mix neem oil with some other carrier (olive oil is always a good choice or try coconut oil for acne) in proportion 1 tbsp to 1/3 cup of other oil and apply gently using cotton ball or stick.
Question Answered: Does Castor Oil Clog Pores?
Do use neem leaf as a paste
Crush fresh neem leaves in hot water and hen apply them on the acne areas, leaving it on till the paste starts drying. Do not let it dry completely though since it will irritate your skin. Wash the paste off gently afterwards with the same water you crushed the leaves in, this will increase the treatment effect.
Do not rub and scrub
Either you are using neem leaf paste or neem oil, or any other acne treatment product, do not rub it or scrub your face. This will result in more irritation and rather cause damage than actual help.
]]>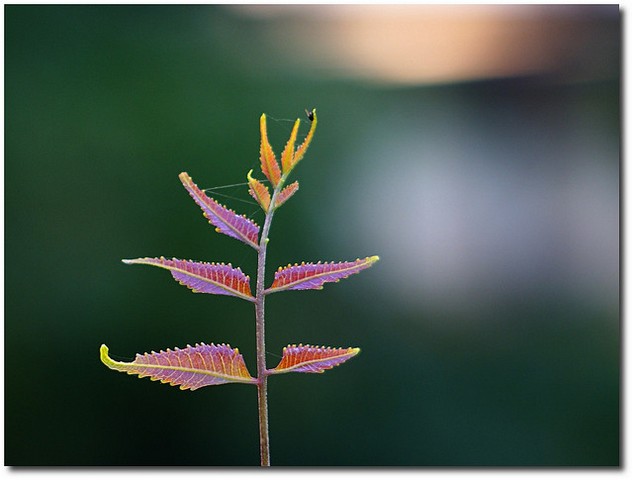
Photo credit: flickr
One of the most convenient and best ways to use neem oil is neem oil spray. You can use it either for gardening purposes or as a repellent against insects. It can be used for your protection against biting insects and you can use it for your dog to keep the parasites away. From this article you will learn how to make and use neem spray oil.
Gardening purposes
Neem oil is a perfect insecticide that will keep your plants safe from non-beneficial insects. Since it works from inside the plant, it can be poured in the ground with the following absorption by the plant, but it is easier to simply spray your garden. Neem does not affect beneficial insects and is not harmful to people so it is an additional bonus why you should choose it as your insecticide.
SEE ALSO: Make Your Own Tea Tree Oil Spray
Repellent
Either you want to use it for yourself (in case of mosquitos or bed bugs) or you want to treat your dog to prevent the attack of mites or fleas, neem spray is a perfect solution. Plus neem oil is extremely beneficial for the skin so it combines few beneficial features in one product. Read how to use neem oil for bed bugs elimination.
YOU MIGHT ALSO LIKE: Black Walnut Oil for Parasites Removal
How to make neem oil spray
Making neem oil insecticide
For insecticide spray you will need 5ml of neem oil, 1-2ml of some detergent (preferably insecticidal soap) and 1l liter of warm water. First mix water with detergent and only afterwards slowly pour the oil, stirring constantly. Once the ingredients are mixed well, put them in the spray container and remember to shake before spraying. As well it is recommended to use the mixture within eight hours after preparation. If you need another proportions or measurements, check Discover Neem for additional information on the making process.
Making neem oil spray for personal treatment
The procedure and ingredients are the same, except you should use mild liquid soap instead of insecticidal one. A 1% solution is good enough for a repellent so the amount of neem you will need is real small. It is recommended to use the spray immediately after preparation, the maximum duration of storage is also eight hours.
]]>Photo credit: flickr
Proper night rest is utterly important for any human being, and any interruption is highly unpleasant. The use of neem oil for bed bugs elimination has been known for a long time. Neem oil is a natural repellent. How to use it to get rid of bed bugs?
What are bed bugs?
Bed bugs are small red flat insects that feed on blood of the warm-blooded animals. The nasty thing about them is that they hide in all possible places, including cracks in the furniture and walls and come out at night only with the aim to eat. They also can survive a year without meal, so it can be real hard to get rid of them since you can never know for sure where their hiding spot is.
And here neem oil comes in use. Since it is a perfect repellent as Wikipedia states, it may be actively used in fighting bed bugs. However, it does not totally eliminate them and cannot be used as a single weapon against these creatures. A whole plan has to be developed and only then you will be safe from bites.
SEE ALSO: Tea Tree Oil for Fleas Removal
Action plan
1) Firstly, give all your linen and clothes a real good wash. Before using neem oil you have to get everything prepared for the neem application. The preparation is the same as used during applying tea tree for lice removal.
2) Vacuum your bed, mattress and the area near your bed.
3) Now you can either buy or make a neem oil spray and apply it. For making the spray, mix neem oil, water and some detergent together and put it in a spray bottle (read also how to make a tea tree oil spray). After you have neem spray ready, apply a thin mist on your bed, linen, clothes and even the area near your sleeping place. You also may apply neem oil on your skin as it will keep the bugs away (repellent-effect).
YOU MIGHT ALSO LIKE: Neem Oil for Skin – Benefits and Uses
Note: it is important to remember that the procedure has to be repeated and single use of neem oil does not give you the guarantee of bed bug-free environment.
]]>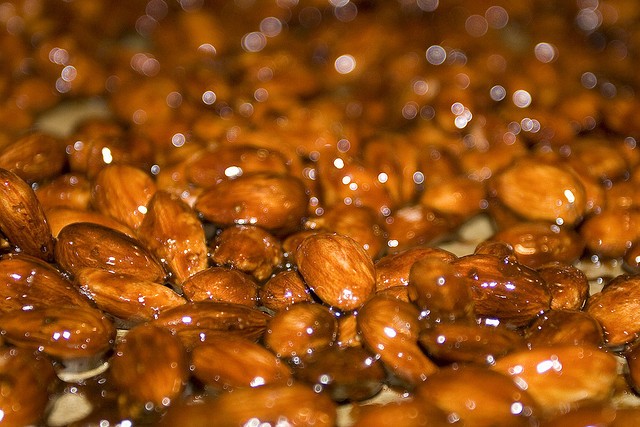
Photo credit: flickr
The best way how to make almond oil at home is a special almond oil press. There are also other ways to receive almond oil. We’ll describe all of them.
What is almond oil?
Almond oil is derived from almond nuts which are the seeds of fruit that grow on almond trees. Almond oil is one of the best skin care products. According to Health Guidance, almond oil is used for dry skin, it reduces wrinkles, treats inflammation, facilitates psoriasis, eczema and skin rashes. It conditions hair and make it stronger. Almonds are high in beneficial unsaturated fatty acids, vitamins, minerals and protein. These constituents of almond oil are maintained in almond oil when this oil is cold-pressed and organic.If you can’t find or afford almond oil on the market or you don’t believe that it is an organic product, you can make almond oil independently using a rather simple guidance given by Michael Joseph Hall (“How to Make Almond Oil”).
Almond oil is used safely for cosmetic purposes as it has no side effects for people without allergy to nuts. You may do your own creams, masks, lip balms, hair conditioners, massage oils and other things after you get to know how to make almond oil at home. Read more about almond oil benefits.
SEE ALSO: Almond Oil for Stretch Marks
How to make almond oil at home?
1. Take well-dried almonds. Make sure they are not old and of high quality. Put them in a blender and crush. At first start with a low speed, increase it gradually to high.
2. Pause your blender for some time and start again. When your almonds stick together and form a sphere, it is necessary to stop the blender from time to time and clean off almonds.
3. Continue grinding. After some time the sphere will become a paste.
4. Add one more teaspoon of unrefined olive oil. Add more oil if you like.
5. When the paste is ready, put it in any glass jar and keep for 1-2 weeks at a room temperature. You should separate almond oil from an oil cake.
6. You may use your own almond oil for skin and hair care, as an aromatic remedy.
Almond oil press
There are manual hand almond oil presses in sale now. Their size is very small and they are really easy in operation. Even one person individually may use it and make oil at home. Such manual hand oil press can process various seeds and nuts, not only almonds. How to make almond oil at home with this press?
At first whole almond nuts together with seed coat should be prepared. Then you should mount your almond oil press on a stable surface (for example, table). Before you put almonds into the expeller inlet it is necessary to heat the press cage. When you finish all preparations, you may start turning the expeller crank to produce your own oil. Find out all almond oil uses.
RELATED: How to Make Walnut Oil
Attention
If you make your own almond oil at home you may notice that it is cloudy. It is so because if its natural particles. It is safe to use almond oil with them. Or it is possible to leave it still for a day and the particles will settle down. Afterwards simply pour clean oil into a jar or a bottle.
]]>
A lot of people have evaluated a castor oil face wash for natural cleansing of the skin. Castor oil is a wonderful skin and hair care product. It is rich in unsaturated fatty acids according to Wikipedia. The oil has a moisturizing, nourishing, healing and cleansing effect. The ricinoleic acid in castor oil is considered anti-inflammatory as Wikipedia states. Try it and you will forget of commercial face washes.
Oil cleansing method
The oil cleansing method is a way to clean skin pores, to remove dead cells and debris causing blackheads and inflammation. The face cleansing is done in the evening. The morning is not a good time for it as your skin should have a rest after the procedure. The task of the method is to clean your skin deeply and at the same time to balance oil production in the skin. It is important not to overcleanse our skin so it is not recommended to conduct oil cleansing every day.
SEE ALSO: Castor Oil Uses: get to Know All of them
Step 1 To start with, you will need a castor oil face wash, water and a soft cloth. The castor oil face wash recipes are below. First of all, take some oil in your palms and warm it up rubbing hands together. Then put the oil onto the face.
Step 2 Massage the oil over the face in a circular way. Make firm and slow movements. You don’t need to wash the face prior because the oil will remove dirt, makeup, mascara and impurities. Relax your face muscles. The massage will take you some time as the oil is dissolving the impurities
Step 3 When you believe that the oil has saturated the pores take a cloth and soak it in the warm water. Cold water won’t take away all the oil as it cannot open the pores. Wipe your skin gently removing the oil. Rinse the cloth in the warm water again and wipe the skin again. Repeat several times. Avoid scrubbing. The oil will be removed easily with the dead skin cells, bacteria, blackheads and so on.
Step 4 If you feel that your skin is tight take a small amount of the castor oil face wash, just a few drops, and apply it on the skin.
You may also apply jojoba oil for oil cleansing.
YOU MIGHT ALSO BE INTERESTED IN: When You SHould Try Macadamia Nut Oil for Face
Castor oil face wash recipes
Recipe 1
This recipe is intended for people with dry skin. Castor oil has a strong drying and cleansing effect. If your skin is already dry it is a good idea to mix castor oil with another oil with the proportion of 1:9. So to make your personal face wash mix 10% of castor oil with 90% of sunflower oil. Sunflower oil is good for dry skin.
Recipe 2
In case you have an oily skin you will need:
- 30% of castor oil and
- 70% sunflower oil.
Mix the oils and use the oil cleansing method described above. You may try extra virgin olive oil instead of sunflower oil. Read more about the benefits of olive oil for face.
Recipe 3
You probably understand that the oilier the skin is the more castor oil is necessary for a face wash. If your skin is balanced the ratio of 20% of castor oil and 80% of sunflower oil will be excellent.
The advantage this recipe is that you may make your own blend according to the type of your skin. If you feel tight and dry after its application add more sunflower oil. In case your skin is oily take more percentage of castor oil. Experiment and enjoy your personal natural castor oil face wash.
]]>
Photo credit: flickr
Castor oil is known for its amazing benefits for skin. Try to make a castor oil soap at home to get all the oil can give to your skin. Castor oil soap will provide moisturizing, nourishing, anti-inflammatory and healing effect on your skin due to the fatty acids in its composition as Wikipedia notes.
Castor oil and soap
Castor oil is a good choice for soap-making. The oil makes soap bubby and creamy but you should use it at a low percentage. It can occupy about 5-10% of all oils in a soap bar. If you take more castor oil you will receive a sticky or soft bar of soap. Even 5% of castor oil will provide you with all its benefits.
SEE ALSO: A Homemade Hemp Oil Soap – Unusual but Efficient
Recipe 1
The easiest way to make a castor oil soap is to take a glycerin soap base and add the oils of your choice. You may add sweet almond oil beneficial for skin, jojoba oil, olive oil and castor oil. Just melt the base before adding the oils and mix them thoroughly. Pour the mixture into molds and you will have an easy-to-make natural soap.
Recipe 2
If you are short of the glycerin soap base but you want to make a castor oil soap try DIY liquid soap. Grate a bar of any natural soap; mix it with some water and heat. Add 1 teaspoon of glycerin and oils. You may use essential oils, for example, lavender oil or rosemary oils. Don’t add too much castor oil. Combine it with other oils you have at your disposal. If you want to achieve a healing effect add tea tree oil too. A tea tree oil soap will heal all your skin diseases.
RELATED: Benefits of Soap with Castor Oil for Skin Care
Recipe 3
If you love making soap at home you may try a wonderful recipe of a castor oil soap for you.
You will need:
- 6 oz of water
- 2.3 oz of lye
- 4 oz of palm oil and coconut oil (read more to know if coconut oil clogs pores)
- 1 oz of castor oil
- 4 oz of shea butter
Instructions
- Pour the water into a pot. Add the lye into the water and not vice versa. Be careful. As a result of the chemical reaction it will become hot. Now you should cool the mixture until it has 100 degree F.
- Meanwhile, mix oils, preheat them up to 100 degree F and slowly pour into the lye solution when it has the right temperature. Blend all this.
- Pour the mixture into the molds. The mixture will become solid. So place the molds in a warm place. Cover them and put a blanket above. Keep covered for 24 hours.
- After that you may cut solid soap into bars if you like. According to Wikipedia it is better to leave soap bars for 2-6 weeks. During this period excess water evaporates and the process of saponification will be totally complete.
Photo credit: flickr
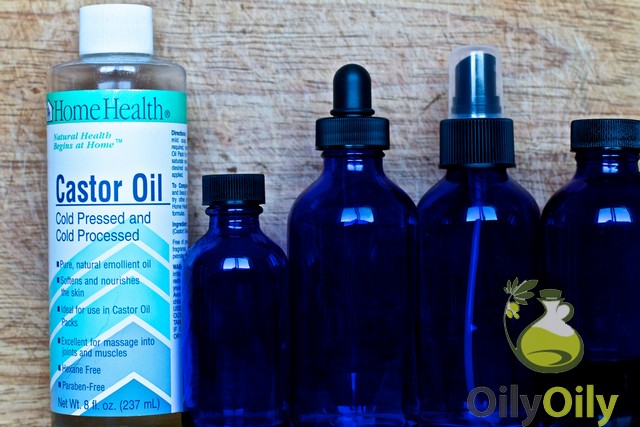
Have you ever heard of a castor oil shampoo? It is possibly so. Castor oil is famous for its healing properties. As Wikipedia states the oil is applied as a laxative, for pain relief and for the immune system support. Castor oil is also used as a skin and hair care product because of its excellent benefits. One of the castor oil applications is a castor oil shampoo. How to make castor oil shampoo at home?
Castor oil shampoo for dry hair with greasy roots
If you have dry hair but greasy roots a homemade castor oil shampoo can help. Castor oil will dry out the excessive oil from the roots at the same time sealing in the moisture inside the hair, making it smooth and lively. For this shampoo you will need:
- 3-4 tbsp of coconut milk (coconut milk and coconut oil are used for hair care quite often)
- 2 tbsp of extra mild organic shampoo
- 1 tbsp of castor oil
- 5 drops of essential oils of your choice.
Mix all the ingredients together in a bottle and use as a regular shampoo. If you are short of coconut milk you may use jojoba oil or vitamin E instead of it. Just remember to lessen the amount. You may buy all you need for the castor oil shampoo at amazon.com. It provides a wide choice of organic cold-pressed castor oil.
SEE ALSO: How to Use Grapeseed Oil for Hair Care
Dry castor oil shampoo
Dry shampoo absorbs the excessive oil from the hair and makes it look clean. This type of shampoo is used when we are lack of time or have no possibility to shampoo the hair with a wet shampoo, for example, during a journey. Dry castor oil shampoo has a wonderful effect as castor oil is an excellent drying agent. You can make dry castor oil shampoo at home and take it with you in your trip or to have it hand at home. How to make a dry castor oil shampoo? You will need:
- 2-3 tbsp. of cornmeal or cornstarch
- Baby powder
- Castor oil
- Lemon oil
Step 1
Place the cornstarch or cornmeal into a bowl. Add some baby powder. You don’t need a lot. Baby powder and corn starch absorbs the oil and dirt from the hair roots.
Step 2
Mix the ingredients thoroughly in a bowl. Add castor oil and lemon oil. A few drops will be enough. They also dry out the scalp and fresh the hair. Your dry shampoo is ready.
Step 3
Take the dry shampoo and rub it onto your scalp. Distribute evenly on your hair roots. Comb the hair.
Step 4
Do all this over a sink as the excess powder can fall on the floor.
YOU MIGHT ALSO BE INTERESTED IN: Olive Oil and Hair Growth – Easy and Effective
Warnings
Dry shampoo is better for short hair. In case your hair is long you should apply dry shampoo only to the roots. It will absorb the oil and makes you look fresh. If you use dry shampoo over all your hair it will be a mess.
]]>
Photo credit: flickr
Safflower oil benefits for skin are astonishing. The oil is successfully applied for skin care. Its texture is very light and penetrates the skin rapidly. With the help of safflower oil skin care can become enjoyable and effective.
Nutrients and influence of safflower oil on skin
There is high oleic and high linoleic safflower oil in the market (you can find more about types of safflower oil here). Linoleic safflower oil is high in essential linoleic acid, responsible for moisturizing properties of the oil. Unhealthy and dry skin cells can be recovered by regular intake and topical application of safflower oil that will help promote the skin elasticity.High oleic acid safflower oil is also a great moisturizer. It hydrates dry skin, makes it smooth and young.
Safflower oil contains a lot of vitamin E. It helps avoid the cell membranes damage, keep the membranes integrated and protects the skin from cancers or degenerative diseases. So safflower oil used regularly can retard the aging process.
SEE ALSO: When to Use Walnut Oil for Skin
Safflower oil benefits for skin: how to use
Safflower oil benefits for skin when it is used both topically and orally.
Topical application
Safflower oil applied topically helps moisturize the dry skin. MotherNature.com calls safflower oil an effective and safe way to hydrate the skin, especially the sensitive one, as the natural oil is not harmful for it and can help keep moisture. The ways of safflower application are as follows:
- Mixing safflower oil with a drop of almond oil (almond oil has a lot of benefits for skin too) and applying on the hands twice a day will make your weary hands smooth and soft.
- When you have a shower or a bath, use soap with safflower oil. It will clean your skin and keep it moist at the same time.
- After a shower massage some safflower oil onto your skin. It locks the moisture inside and creates a thin film that protects the skin from environmental pollutants and prevents the skin from being dried out. You may use it several times a day if necessary.
- Safflower oil for skin care can even lessens the wrinkles, as it hydrates the skin, makes it soft and protects from harmful UV exposure.
- Safflower oil can help you treat acne. Just choose cold-pressed organic variety.
- You can use safflower oil for skin care of children and even newborn babies. It is considered beneficial with no dangers.
- Safflower oil benefits for skin include anti-inflammatory activity of the oil that can fasten the process the skin healing.
Consuming
When you use safflower oil for cooking, it nourishes your skin cells with essentials fatty acids and vitamin E from inside too.
RELATED: What is Safflower Oil Good for? Benefits for our Health
Warnings
Before the first application of safflower oil check if you have any allergic reaction to it. If you see rash or adverse reactions on the skin after application, stop using it and consult a doctor.
]]>
Photo credit: flickr
The guide of how to make hemp oil is rather complicated. Hemp oil has a lot of benefits. Rick Simpson recommended a homemade oil. If you want to make the oil at home be very careful and attentive.
What you need
- 1 pound (or more) of hemp
- 2 plastic buckets (not less than 1 gallon each)
- solvent (99% isopropyl alcohol or pure naptha)
SEE ALSO: How to Make Avocado Oil
Making hemp oil
According to YouTube presentation “How to Make Rick Simpson’s Medicinal Hemp Oil Safely”, Phoenix Tears and Green Passion home-made hemp oil should pass the following steps:
Step 1. Dry the hemp, by exposing it to daylight.
Step 2. Place hemp in plastic bucket and pour in enough solvent to dampen it.
Step 3. Pound the material in the bucket with wooden stick or pole (it should be absolutely free of any chemicals) until it gets crashed.
Step 4. Add more solvent to cover hemp in the bucket. Then stir and crush the content of the bucket for about three minutes, so it gets well saturated with the solvent. This procedure allows THC to dissolve into the solvent.
Step 5. Drain the formed liquid into the second bucket and add fresh solvent to the material. Again add just as much as needed to only cover it and stir again for another three minutes.
Step 6. Drain the liquid into the same bucket in which you drained it first time and leave the hemp material in the first bucket.
Step 7. You can now emit the material from the first bucket as it is no longer needed. Now run the formed solvent-oil mixture from the second bucket through coffee-machine filter and drain it in a clean container that holds at least half a gallon.
Step 8. Gently pour the filtered mixture in a rice cooker so that it is about ¾ filled and put the cooker to high.
QUESTION ANSWERED: Where to Buy Hemp Oil?
Step 9. Carefully watch the mixture and add more of it as it is being boiled off. Repeat, until all mixture is in the cooker.
Step 10. Add a teaspoon of water in the mixture when it is almost the end of boiling (the mixture should be about 1 inch down in the cooker).
Step 11. Carefully take the cooker and slowly swirl the mixture around in order to release any remaining alcohol. Then pour the mixture into a stainless steel container. The cooker can be shut down.
Step 12. Place the container on a coffee warmer in order to evaporate water and volatine turpins from the oil. You can take the container off, when you see the bubbling (and any other activity) on the oil surface stopped.
Step 13. Now pour the oil in the bottle and let it cool down before you start using it.
]]>